Core exercises without crunches
Five floor moves that train your middle to hold still: dead bug, knee plank, plank, side plank and bird dog.
Your core's main job is to keep your trunk steady while the rest of you moves. That is why these five moves are mostly holds and slow reaches rather than sit-ups. They are easier on your neck and lower back, and closer to what a push-up or a squat asks of you.
Breathe through every one and never hold your breath. If your lower back aches or your hips sag, make the move smaller or choose the easier version. A short, clean hold is worth more than a long, sagging one.
The moves, one by one
A mat or a folded towel on a non-slip floor is all you need.
Dead bug
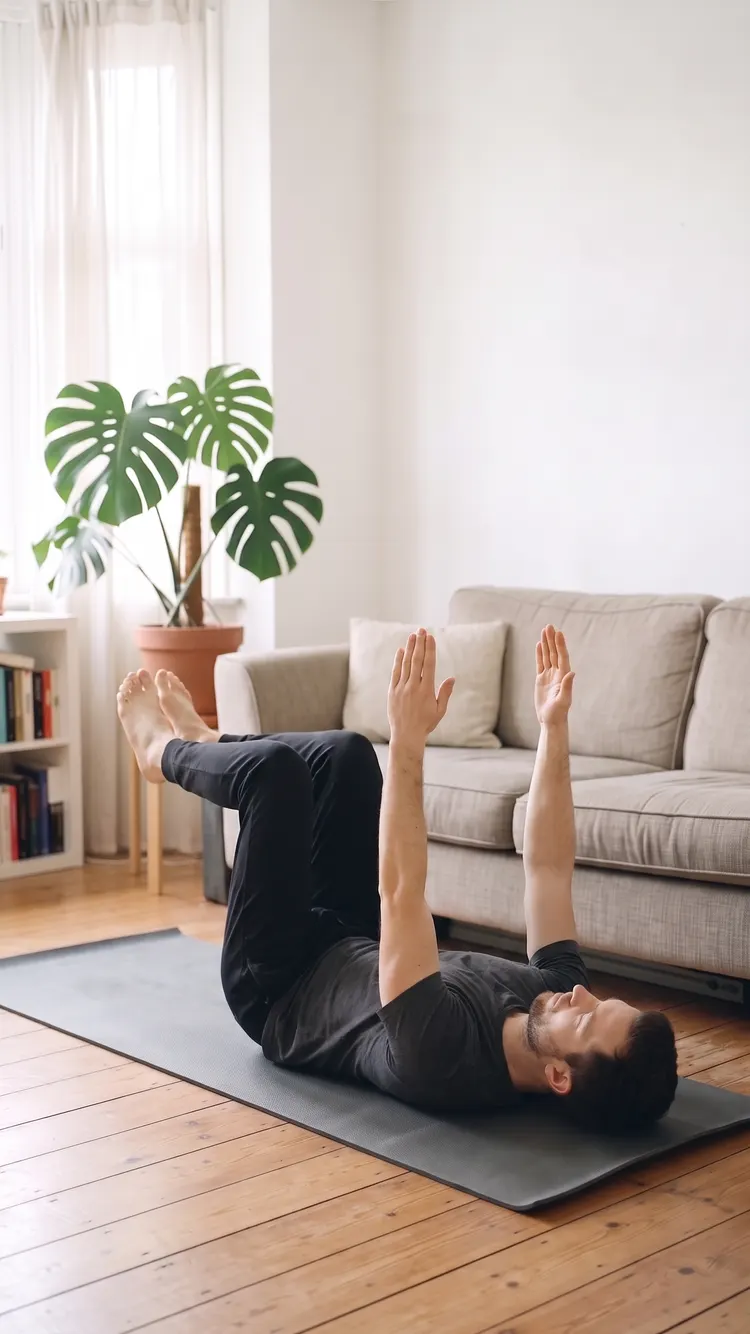
On your back, lower one arm and the opposite leg slowly. Keep your lower back on the mat.
- Lie on your back on a mat or folded towel on a non-slip floor. Get down to the floor slowly.
- Reach both arms up toward the ceiling. Lift your knees so they stack right over your hips, bent at 90 degrees.
- Let your lower back rest gently on the mat. Keep your neck relaxed.
- Breathe out and slowly lower your right arm overhead and your left foot toward the floor.
- Breathe in as you bring them back. Then switch to the left arm and right leg.
- Do 4 slow reps, alternating sides.
EasierMove only your legs, tapping one foot toward the floor at a time, with your arms still.
Take care
- Back: if your lower back aches or lifts off the mat, make the range smaller.
- Neck: let your head rest on the mat. Never pull on your head.
- Hips: keep the knees over the hips and stop short of any pinch.
Knee plank
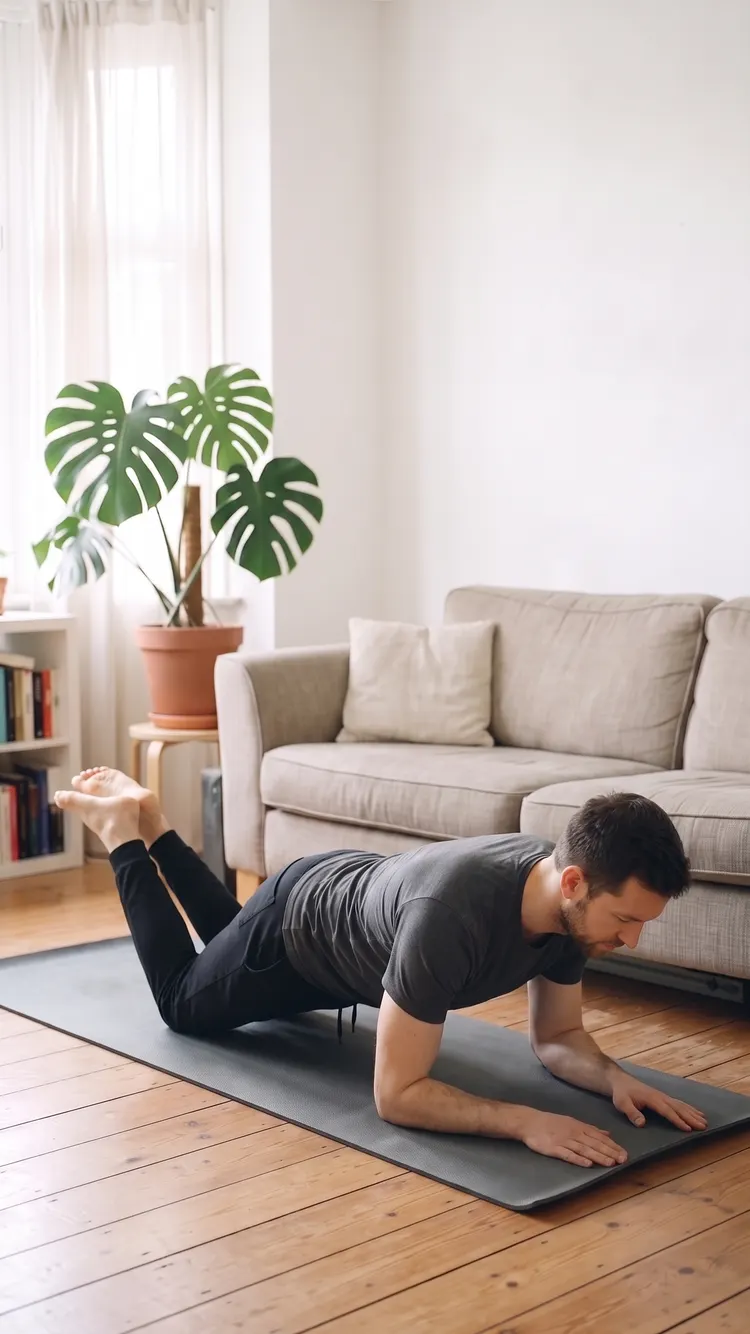
A plank with your knees down. It teaches the straight line from head to knees.
- Kneel on a mat or folded towel on a non-slip floor.
- Place your forearms on the floor, elbows under your shoulders.
- Walk your knees back until your body makes a straight line from head to knees.
- Draw your lower belly in a little and hold, breathing steadily.
- Hold for 15 to 20 seconds, then lower your hips and rest.
EasierHold for 10 seconds, or rest your hands on a counter and lean in (a counter plank).
Take care
- Shoulders: keep your elbows right under your shoulders. Stop short of any pinch.
- Knees: put a folded towel under your knees.
- Back: if your lower back aches, lift your hips a little or rest sooner.
Plank
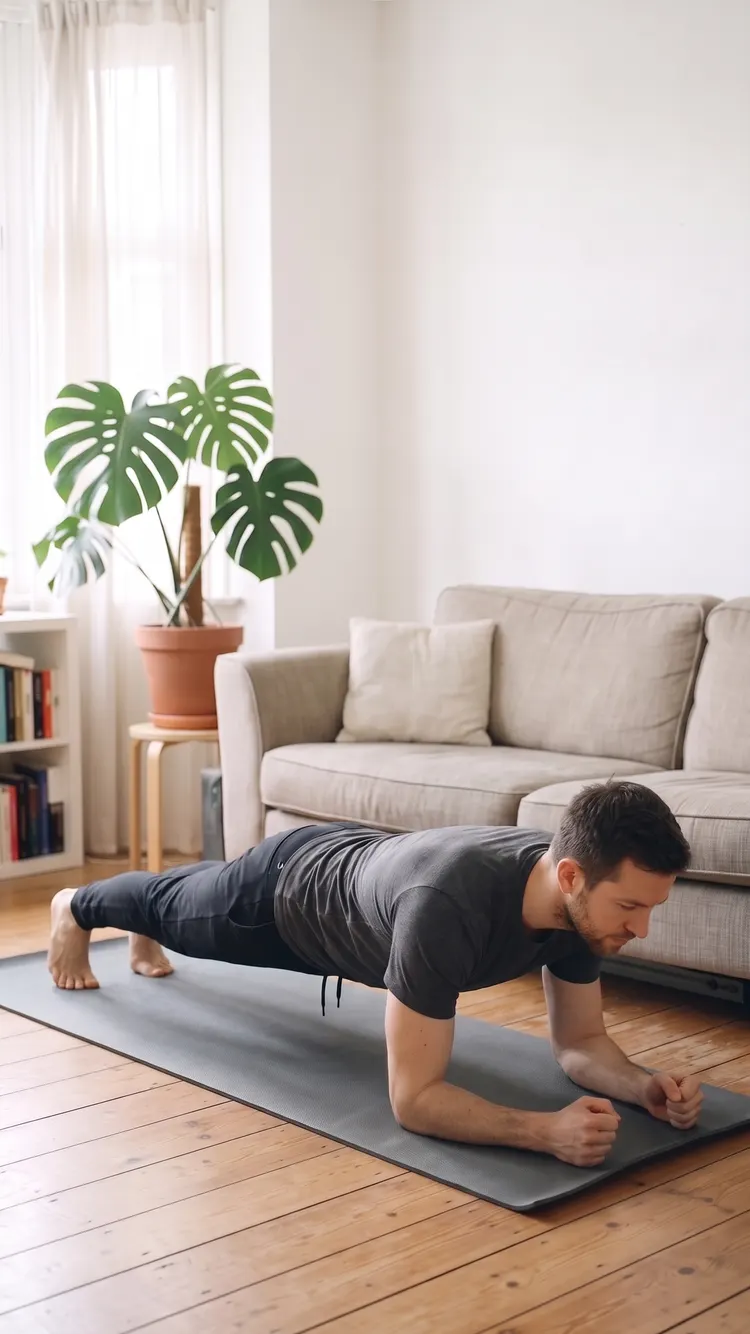
On your forearms and toes, in one line. A short, clean hold beats a long one.
- Kneel on a mat or folded towel on a non-slip floor.
- Place your forearms on the floor, elbows right under your shoulders.
- Step your feet back one at a time, toes tucked, until your body is one straight line from head to heels.
- Squeeze your legs together and draw your lower belly in a little.
- Hold for 15 to 20 seconds, breathing steadily, then lower your knees and rest.
EasierLower your knees to the mat for a knee plank, or hold for a shorter time.
Take care
- Shoulders: keep your elbows right under your shoulders. Stop short of any pinch.
- Wrists: this plank rests on your forearms, so your wrists stay free.
- Back: if your lower back aches, lift your hips a little or lower your knees.
Side plank
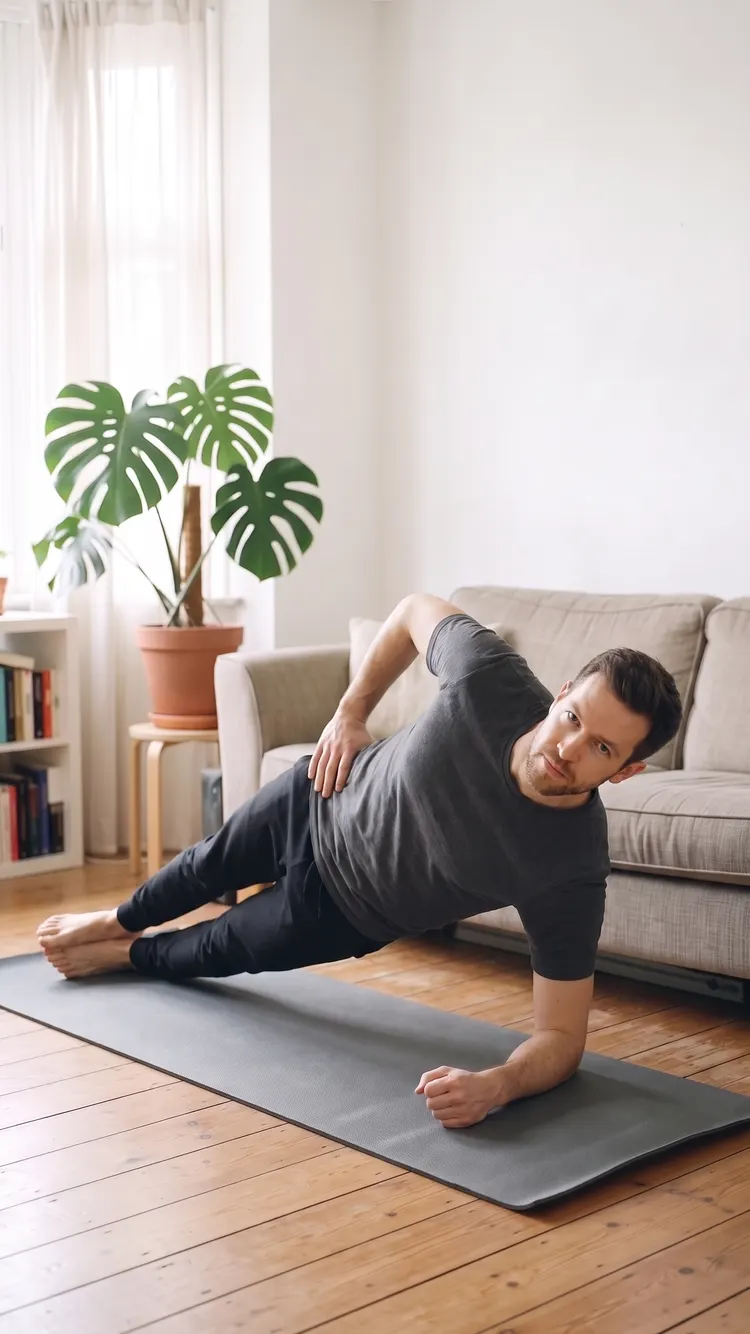
On one forearm and your feet, in one straight line. Do each side.
- Lie on your side on a mat or folded towel on a non-slip floor, legs straight.
- Place your lower forearm on the floor, elbow right under your shoulder.
- Stack your feet, or stagger them with the top foot a little in front for more balance.
- Press into your forearm and lift your hips until your body makes a straight line from head to feet.
- Hold for 10 to 15 seconds, breathing steadily, then lower your hips.
- Switch sides.
EasierBend your knees and stack them for a knee side plank.
Take care
- Shoulders: keep your elbow under your shoulder. Stop short of any pinch.
- Wrists: this plank rests on your forearm, so your wrist stays free.
- Back: if your lower back aches, bend your knees or lower your hips a little.
- Balance: staggering your feet makes it steadier.
Bird dog
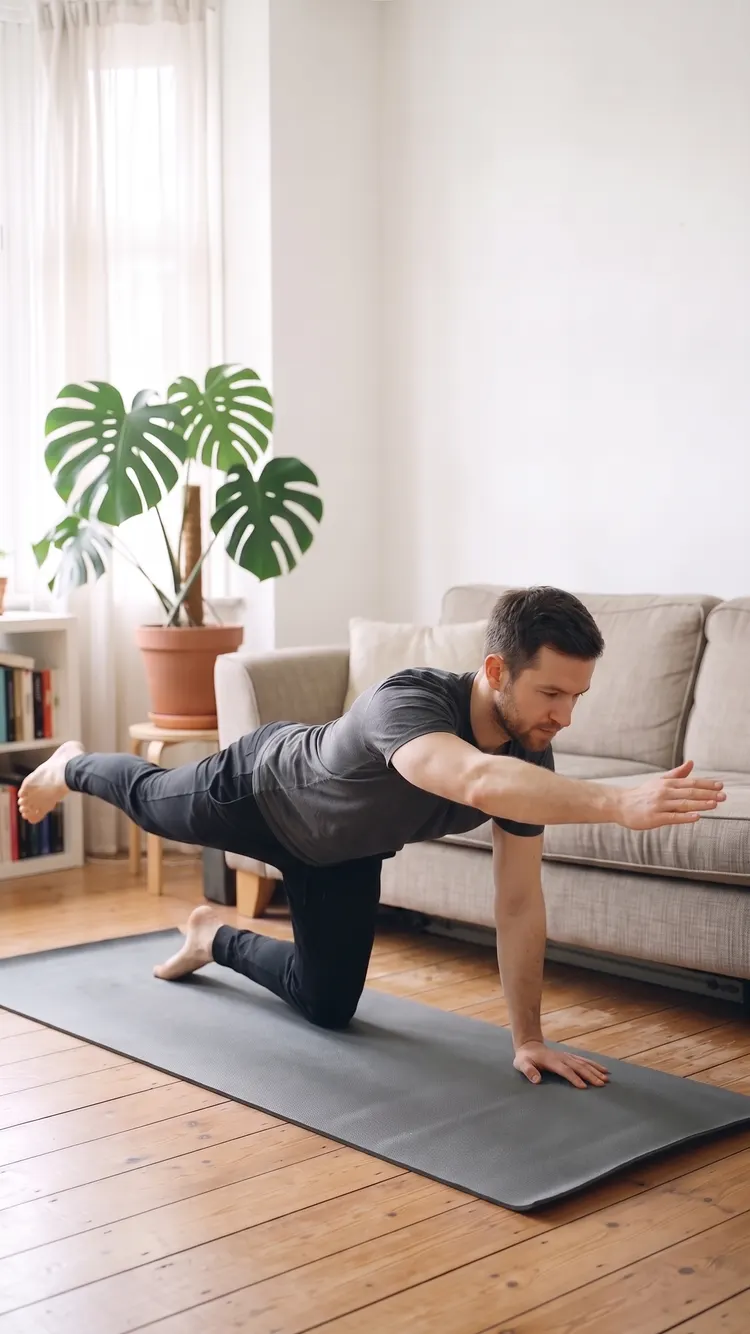
On hands and knees, reach one arm and the opposite leg out slowly. Keep your trunk still.
- Get down onto a mat or folded towel on a non-slip floor, on your hands and knees. Hands under shoulders, knees under hips.
- Keep your back in a long, neutral line and your neck relaxed, eyes on the floor.
- Slide your right leg straight back, toes on the floor. Then reach your left arm forward.
- Lift both only to the height of your back, not higher. Pause for a breath.
- Bring them back slowly and switch to the left leg and right arm.
- Do 4 slow reps, alternating sides.
EasierReach only an arm, or only a leg, at a time. Slide the foot along the floor.
Take care
- Wrists: if your wrists complain, make soft fists or rest on your forearms.
- Knees: put a folded towel under your knees if the floor is hard.
- Back: if your lower back aches, make the reach smaller and keep your leg lower.
- Balance: widen your knees a little to feel steadier.
Adding it to your week
- Two or three days: each move once, after your push-ups or squats.
- Start with the knee plank and the dead bug if the others feel like too much.
- Add a few seconds to a hold, one move at a time.
Build strength with a 28-day calisthenics plan
Short daily sessions at home, a step harder as you get stronger.
What the guidelines say
Activities that strengthen muscles: at least 2 days a week.
Too much? Be as active as your abilities and conditions allow.
Any amount of activity is better than none, and all activity counts.
World Health Organization, Physical activity, fact sheet
Stop if anything hurts, or if you feel dizzy, short of breath or chest pressure.
General information, not medical advice.